What is AutoRABIT for?
Salesforce deployments can be done in many ways. Changeset is a tool commonly used by small development teams. As soon as the team gets bigger, there is a higher chance for developers to start overriding each others code/config due to deployment or development. Another issue with Changeset is the inability to commit changes related to standard fields or installed package into version control. This makes it a bit more difficult to manage a release to Production.
How can we solve this and make the team more productive with their own sandbox as a playground? Here are a few tools which have been globally adopted by the community to go around Changeset limitations:
Eclipse
Git
Jenkins
Yes, these tools work perfectly once they are setup properly, but the main problem is convincing admins to use these tools to commit a change. It can be challenging as it requires quite a bit of technical knowledge. Due to this, we were looking around for a single tool that would remove technical complexity for end users: admins and developers, functional and technical consultants.
In addition, ProQuest Consulting is a full-on Agile Scrum practice, so we want to have the capability to release changes on a daily basis.
To meet all the above requirements, the simple use case that we are trying to target here is:
AS A Salesforce Admin or Developer, I WANT TO commit my changes to version control when I've completed a user story SO THAT the change can automatically be deployed to the QA sandbox using a single tool
Use of AutoRABIT for CI in Salesforce

AutoRABIT is a Salesforce Continuous Delivery Suite with Deployment Automation, Version Control, Data Loader & Test Automation enabling CI for Salesforce. Once AutoRABIT is linked to the Salesforce Sandboxes and the version control we are done with the basic setup.
Let's have a quick look around the basic steps involved:
1. Setup Salesforce Orgs
2. Setup Version Control Repositories and the Branches
3. Align the PROD metadata version with the Master Branch
4. Setup the logged in user by assigning the salesforce user from the sandbox against the logged in user’s name and also the version control user as well
5. Setup a Build to deploy the commit to target sandbox
Once these steps are followed, you are ready to rock and roll! I mean, you are ready to commit. Here are the steps in more detail.
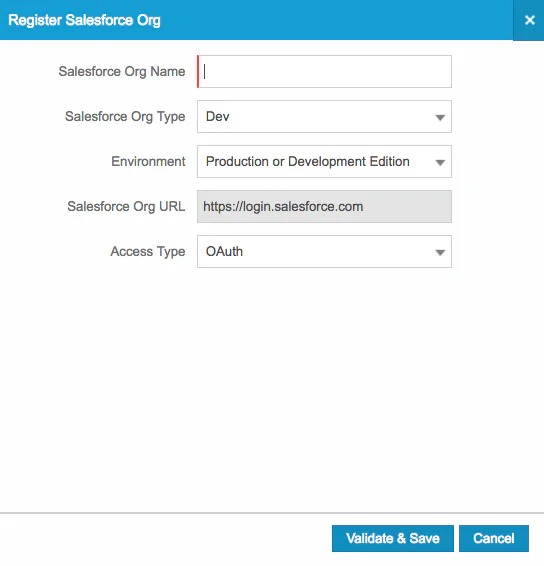
Step 1 - Setup the Source and Target Salesforce Orgs
Go to Admin -> Salesforce Org Management -> Add
Populate the following fields and ‘Validate & Save’
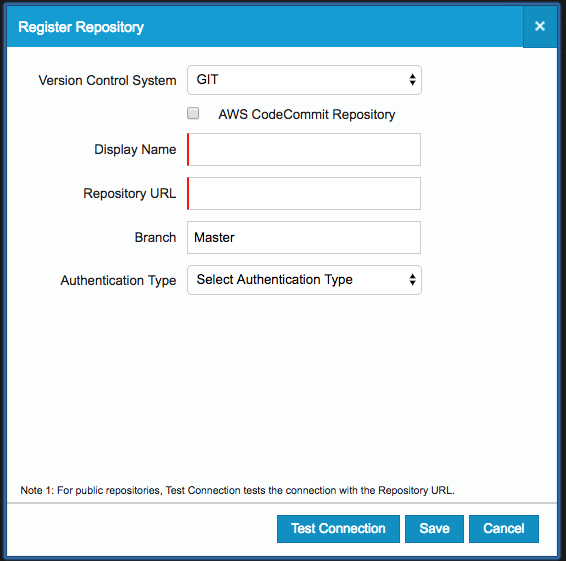
Step 2 - Setup Version Control Repositories
Go to Admin -> Version Control Repositories -> Register Repository
Prerequisite: The repository should be available in the selected version control
Populate the following fields and ‘Save’
Step 3 - Branching Baseline
Go to Admin -> Branching Baseline -> New Branch Baseline
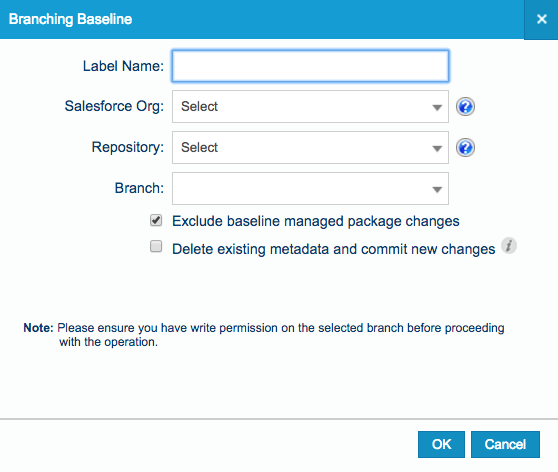
Select the Salesforce Target Org and the repository you created in the step 1 and 2 and press ‘OK’. This will take a copy of the target orgs metadata and do the first commit to the Master Branch.
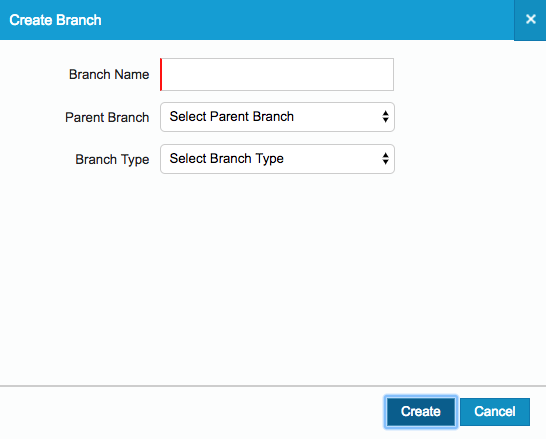
Step 4 - Setup the Developer Branch
Go to Admin -> Version Control Repositories -> Select the Version Control Repository you created in Step 2 -> Create Branch
Step 5 - Setup the logged in user’s profile
- Go to ‘My Profile’
- Scroll down to ‘My Salesforce Orgs’
- Select the Source and Target Orgs and assign the Salesforce Org User against them
- Scroll down to ‘My Version Control Mappings’
- Select the Master and Developer Branch you created in Step 2 and 4 and assign the version control user against them
- Finally ‘Save’
- Go to Admin -> Salesforce Org Management -> Select the Org you created in Step 1 and scroll down to Salesforce Org Mappings
- Select the mapping against the version control that you have setup
- Finally ‘Save Mapping’
Step 6 - Setup the Build
Go to ‘C I Jobs’ -> Create New Jobs
Give a job name in the ‘CI Job Details’ tab and populate the following in the ‘Job Settings’ tab:

- Select the Repository, Branch, Revision and the User. If you want to notify someone about the build success or failure please use ‘Post Build Activities’ and provide the details
- Under ‘Deploy’ select the Target Org and as the Deployment Org. If you do not want to deploy the change to the target but only to validate please make sure that you have selected the ‘Validate Only’ checkbox. If you want to notify someone about the deployment success or failure please use ‘Post Deployment Activities’ and provide the details
- Under the ‘Schedule’ section, please select ‘Build On Commit’
- Finally ‘Finish’
I know there are a lot of steps to cover for setup, but this needs to be done one time only by an Admin.
User Story Execution
Now let’s focus on the action component of the user story we mentioned earlier - I WANT TO commit the change to version control.
In AutoRABIT, we have a feature called ‘EZ-Commit’. The concept is pretty simple.
1. Go to ‘Version Control’ -> ‘New Ez Commit’
2. Select the Salesforce Org and the Author (the user who the consultant did the change as). The Repository and the branch will be automatically selected based on the step 5 details you have provided against the logged in user’s profile
3. Click ‘Fetch Changes’
This will bring all the changes which the Author have done in the Salesforce Org which have not been committed yet to Version Control (AutoRABIT does the calculation by using the last modified date in the salesforce org and comparing against the last commit date to version control branch)
4. Select the changes that you want to commit
5. Create a ‘Commit Label’
6. Click on ‘Compare and Commit’ or ‘Commit’This will commit the selected metadata to the version control branch
Once this is done, it will be committed to version control and this will invoke the build that you have created in Step 5. The build will either deploy the change to the target org or either validate it.
In order to complete the last part of my user story I will need to keep the ‘Validate Only’ unchecked so the commit will be automatically deployed to the target sandbox/org as well. To refresh your mind the below was the last part of my user story which I will achieve:
“which will automatically deploy the user story to the testing sandbox using a single tool.”
Now you saw how easy it was. Typically our consultants just use the EZ Commit feature and rest is automated so that will take the hassle away from the consultant of doing deployments over and over in day to day basis.
You can read more about the tool here.