Over the last few years, the level of concerns about CyberSecurity and company digital vulnerabilities has been exponentially increasing. At ProQuest, we systematically advise our customers on security best practices to ensure Salesforce environments are correctly set up to fully leverage the security features available by the platform.
A key setup that every single Salesforce customer should have activated for their users is MFA: Multi-Factor Authentication.
Because we’ve deployed it to dozens of customers already, we thought it’d be useful to capture the MFA setups in a blog post to help anyone interested in increasing their level of protection start on the right foot.
Please let us know if you have any questions or comments. We are always interested to hear from you and ready to help.
What is Multi-factor Authentication MFA and how does it work?
MFA adds an extra layer of protection against threats such as phishing attacks, credential stuffing and account takeovers.
MFA requires users to prove who they are by providing two or more pieces of evidence (or factors) when they log in:
- One factor is something the user knows, such as a username and password combination.
- Other factors are verification methods that the user has, such as an authenticator app or security key.
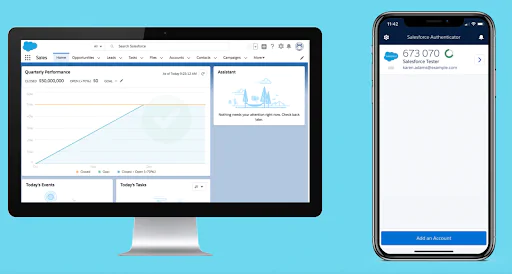
We will be provisioning users with the native Salesforce Authenticator App for their mobile devices.
Roll-out Multi-factor Authentication in Salesforce for your users
The first step in enabling MFA is to create a custom permission set with the ‘Multi-Factor Authentication for User Interface Logins’ system permission
1. In Setup, navigate to Permission Set and create a Permission Set called “Multi-Factor Authentication Required”.
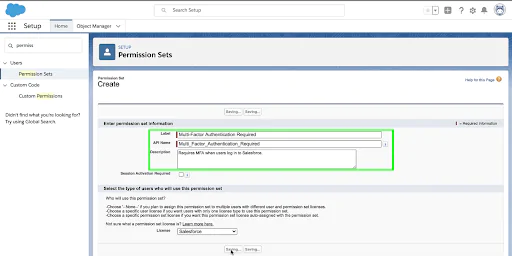
2. In the permission set, check the ‘Multi-Factor Authentication for User Interface Logins’ system permission and click Save
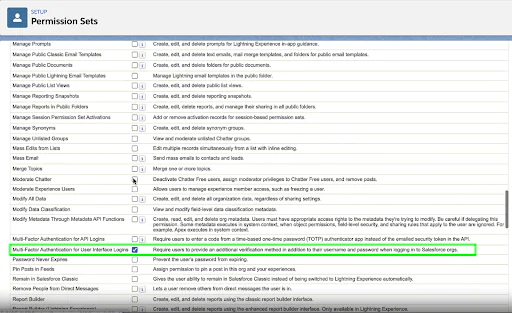
3. Click on Manage Assignments to assign this permission to all users that need to provide multi-layered authentication before logging into the org –

Logging into Salesforce via the Authenticator App
In this example, the screenshots below will outline what is required to log into Salesforce when said user has the MFA permission assigned to them.
1. Download the Salesforce Authenticator App from the App Store (IOS) or Play Store (Android)
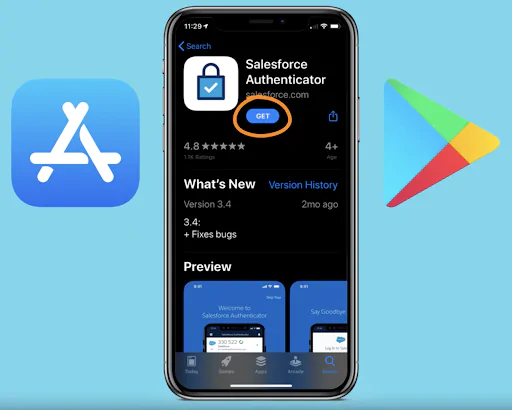
2. Open the app and click “Add Account” – a 2-word phrase will appear on your mobile device.
Log into Salesforce desktop as normal with your username and password. You will be prompted to enter your 2-word phrase from the mobile app.
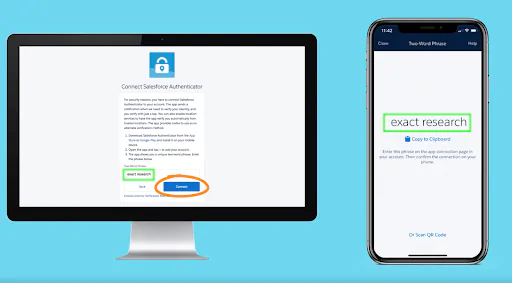

3. Once the correct 2 word phrase is successfully entered on the desktop, click Connect to connect the user’s login details to their org to the Authenticator app
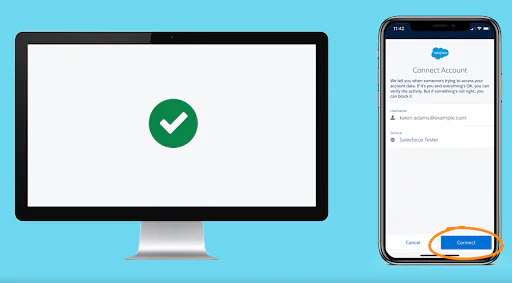
4. Now, whenever the user tries to log in to their org, a prompt will appear to inform the user to approve said login from the Authenticator app on their mobile device
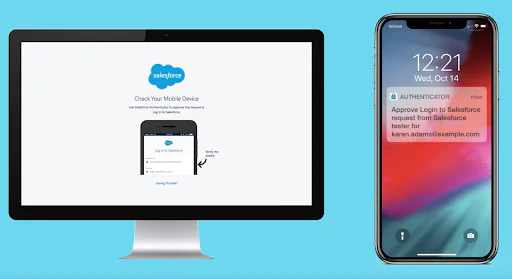
5. User will then need to go into the Authenticator app on their phone and Approve the login

6. Upon successful authentication, users will then be redirected to their org.